Double Pleated Fun Fold Technique
Today I have a card for you that uses the Double Pleated Fun Fold technique. I have also seen this called a Drapery Fold or a Curtain Fold. You can find a lot of examples where the fold is only on the bottom of the card, but I like this version that stretches from top to bottom. What do you think?

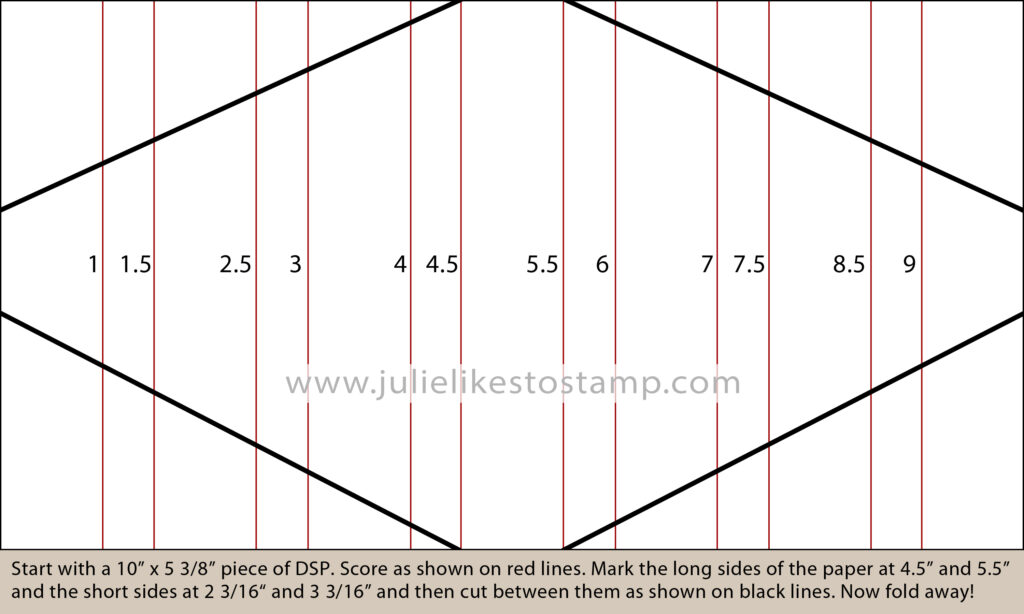
Here are the instructions for this card, followed by a diagram of the double pleated fun fold design for visual reference.
- Start with a piece of Designer Paper that is 10″ x 5-3/8.″ The best type of DSP for this fold is one that has a fun, patterned design on one side and a contrasting, more solid color on the opposite side.
- On the long side, score the paper at the following increments: 1″, 1-1/2″, 2-1/2″, 3″, 4″, 4-1/2″, 5-1/2″, 6″, 7″, 7-1/2″, 8-1/2″ & 9″
- Mark the DSP with a pencil on the long sides at 4-1/2″ and 5-1/2″, and the short sides at 2-3/16″ and 3-3/16″.
- Line up the paper trimmer to each set of pencil marks to cut the diagonal shape as shown (see diagram.)
- Fold as shown, giving each pleat a good press with a bone folder.
- Use an adhesive (I use Tear & Tape) to stick each fold in place.
- Adhere to the background paper cut to 3-7/8″ x 5-1/8″.
- Trim any overhang. I purposely have this overhanging a bit so there is wiggle room to have it matched up perfectly.
- Mat this with a piece of cardstock cut to 4″ x 5-1/4″.
- Finally, add to a standard 4-1/4″ x 5-1/2″ card base.
Hopefully this diagram helps when completing the double pleated fun fold portion of this card. You can always drop a comment below if you have any questions.
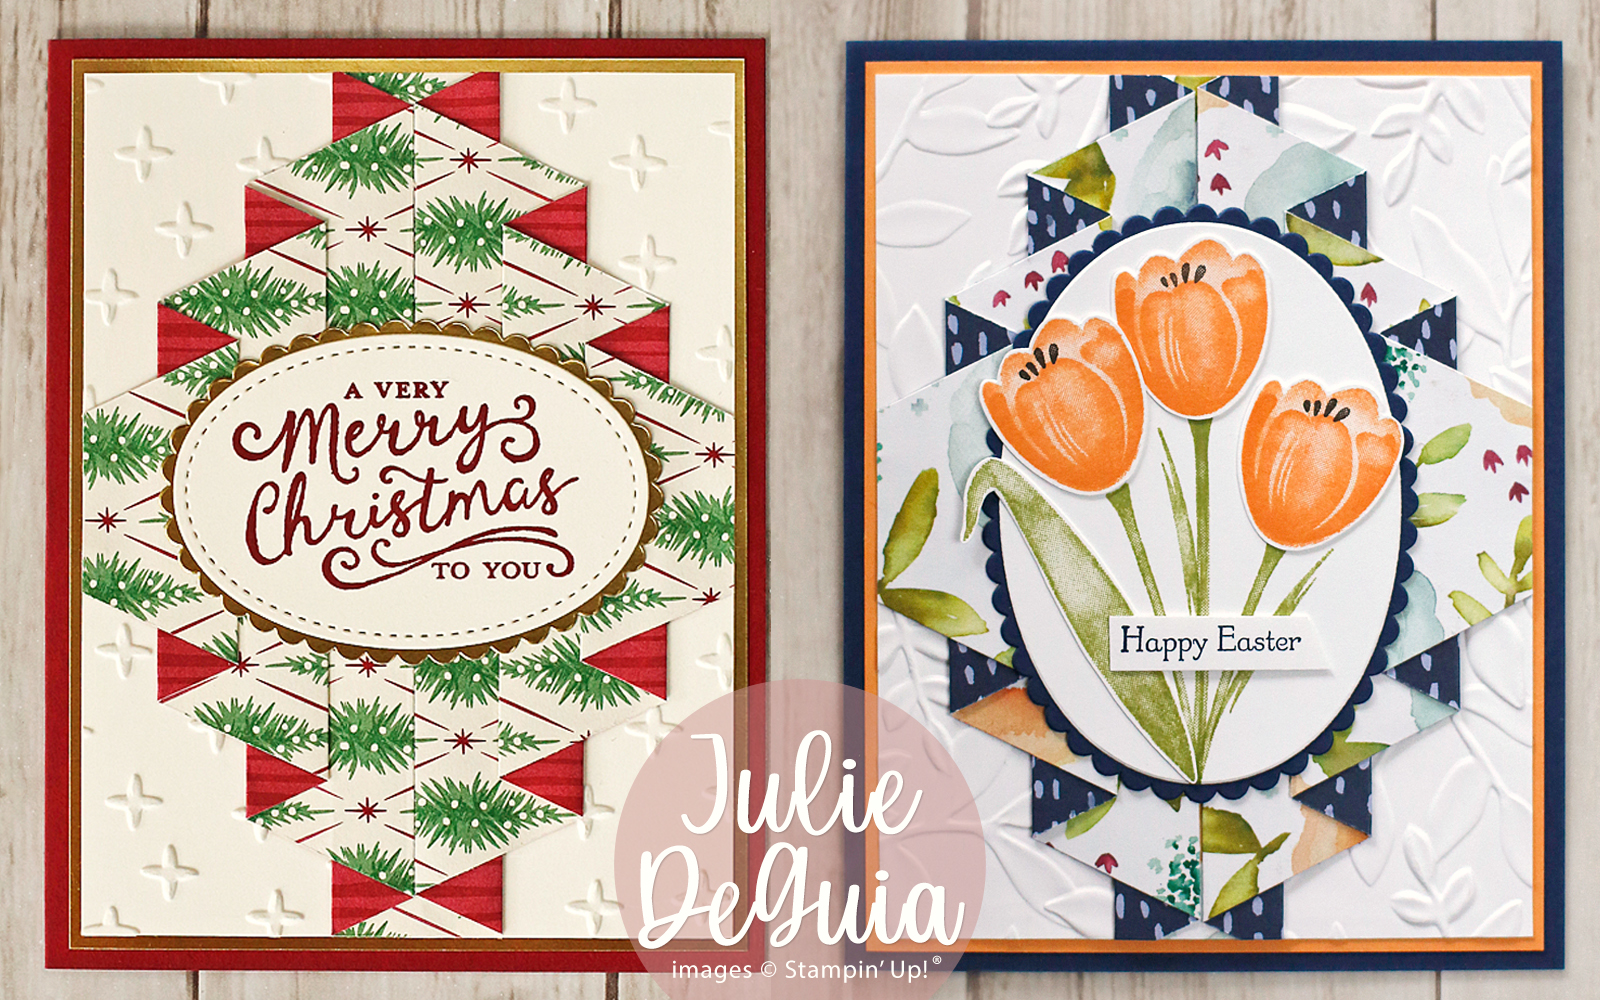
Alternate Examples of this Technique
Here are two other cards I made in the past using this design. As you can see, it works great using an embossed panel behind the folded piece as well as a DSP panel.
If you try this design, please let me know and share your creation in the comments. Sharing is caring!

Leave a Reply